

On this page I detail a way to make an inexpensive but rigid bracket for
attaching a
Robofocusmotor to the Feathertouch 3545 focuser which is common on many larger
scopes.
Incidentally, I am open to making one of these brackets for a small
fee if anyone is interested. But it is very easy to do yourself.
I picked up a 2" x 4" "Angle Framing Anchor" from Home Depot:
Link to Home Depot Angle Bracket.
This angle bracket is the perfect size to hold the Robofocus motor on
the focuser, is galvanized to prevent corrosion, and is fairly easy to
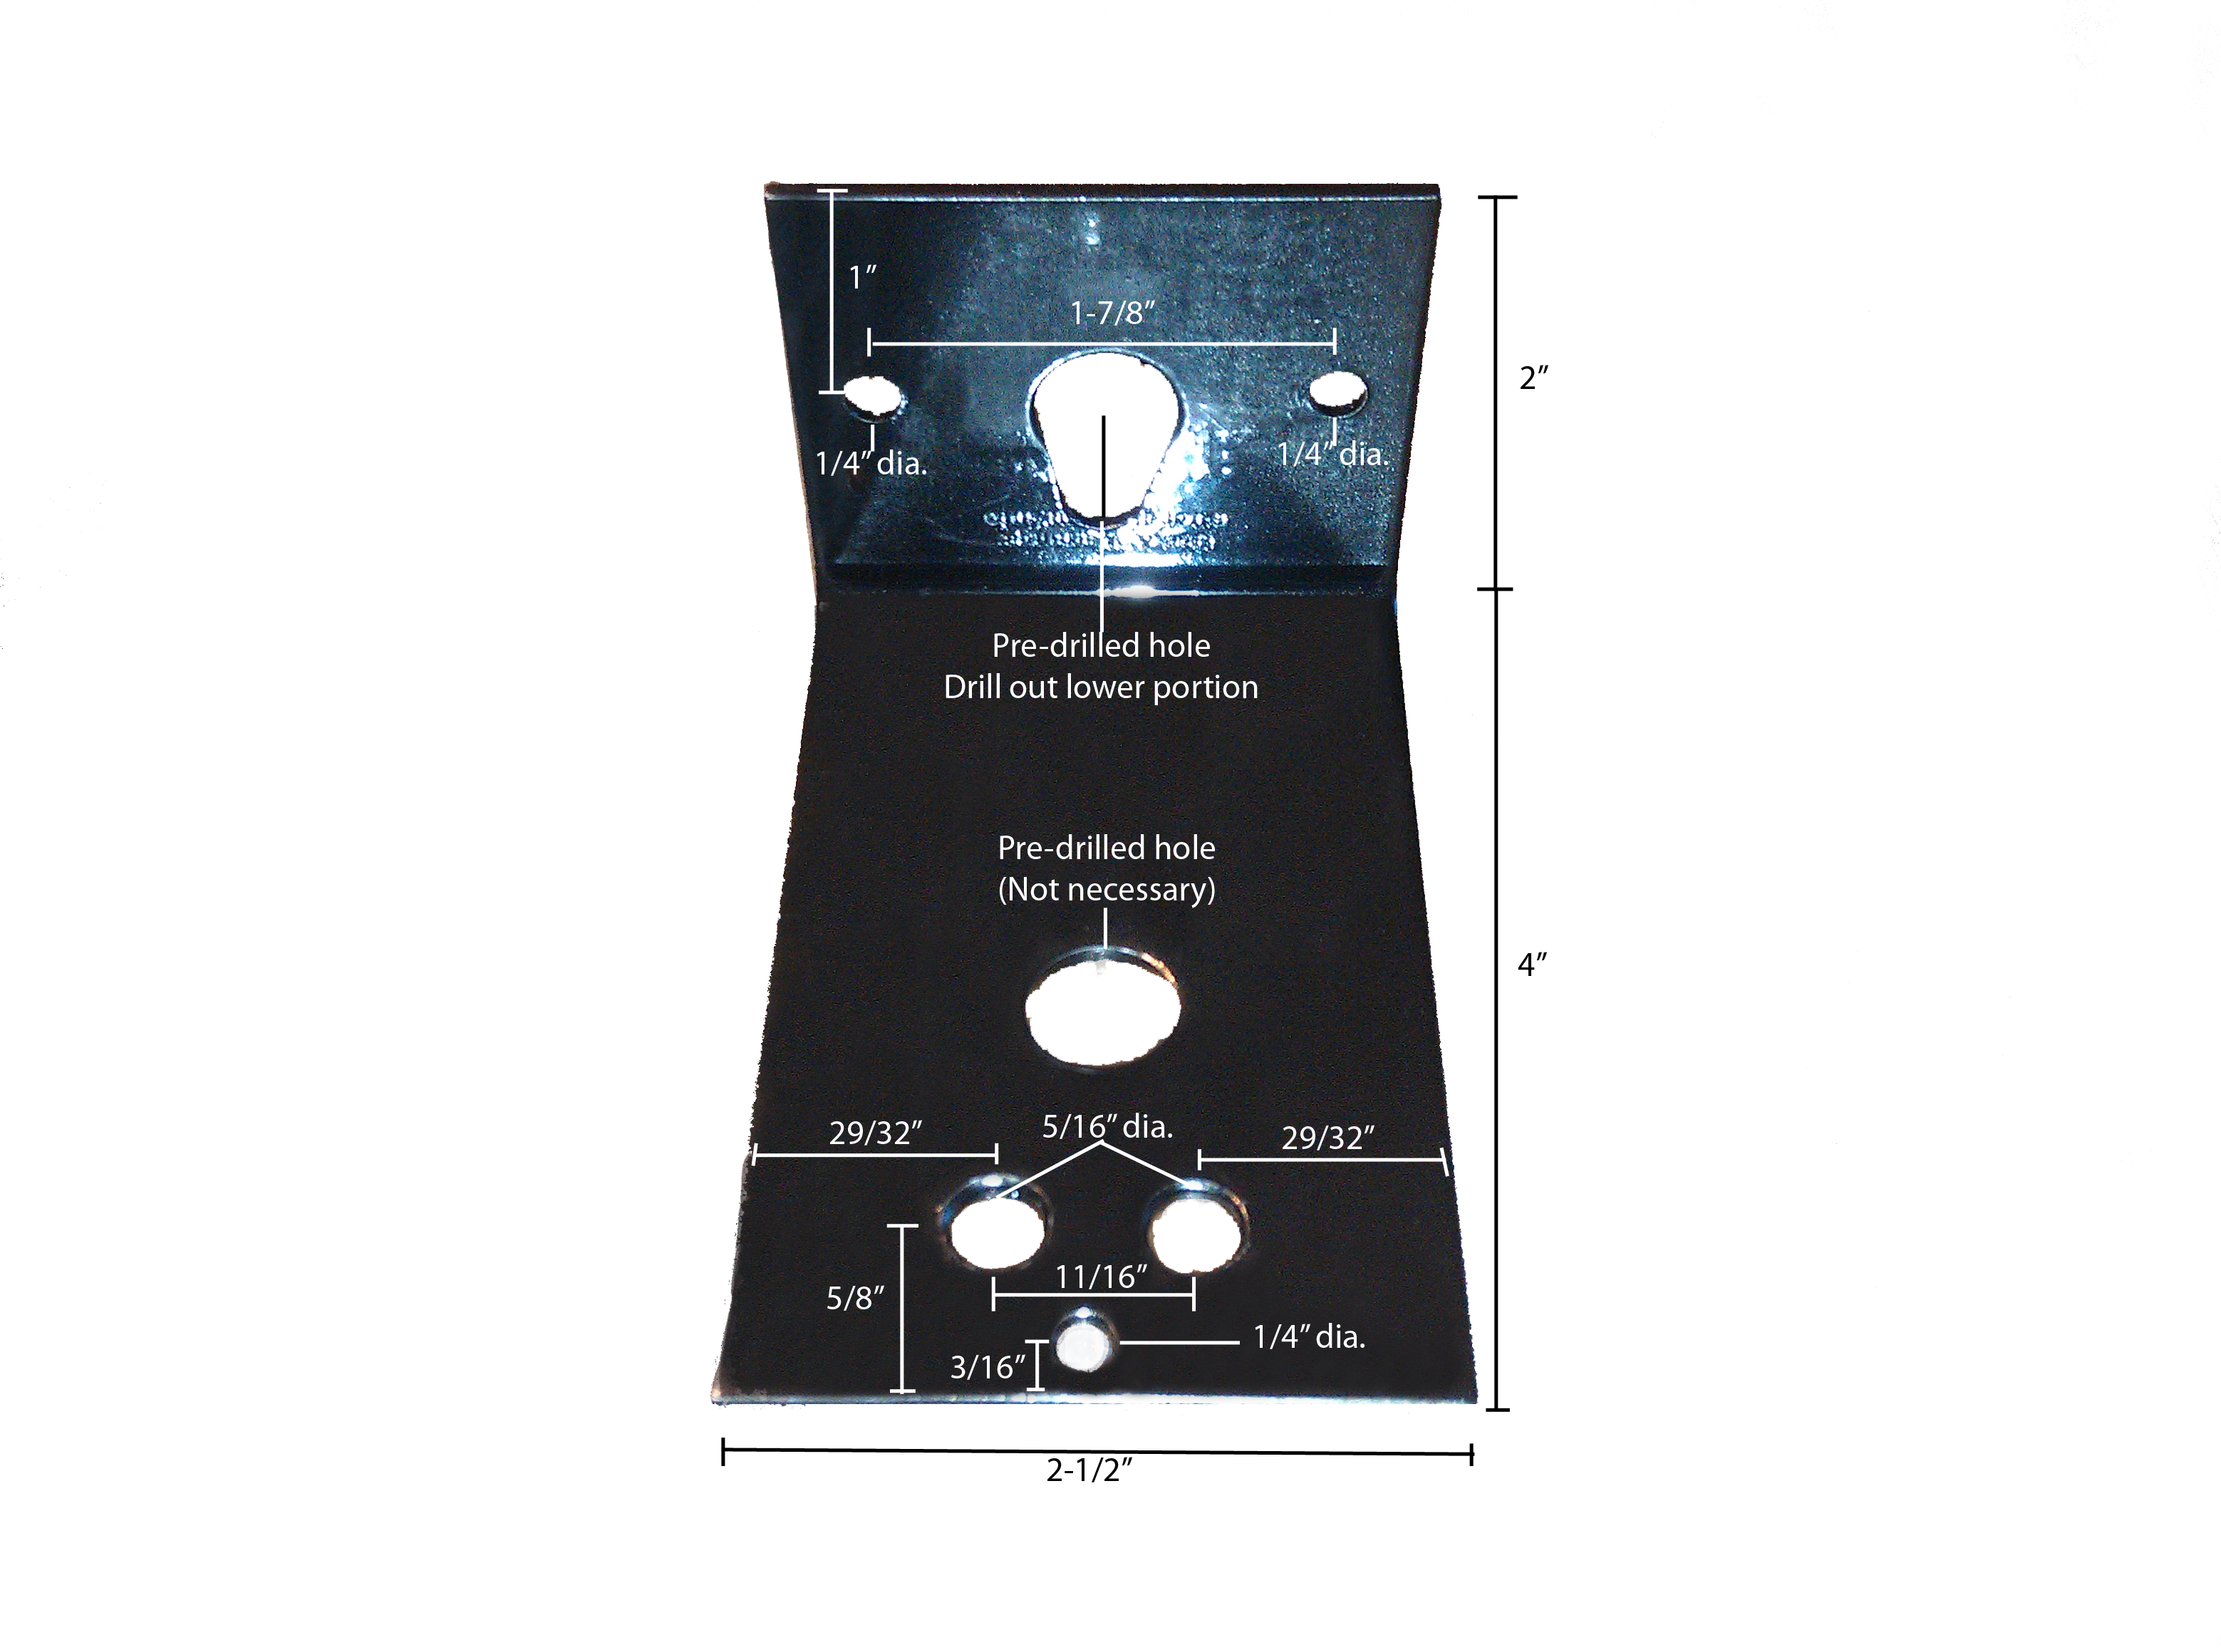
drill. When drilling the holes, it is helpful to first drill a small "pilot
hole" before drilling with the larger drill bit. When you drill the holes
as indicated in the diagram, make sure you clamp the bracket onto a piece
of wood or something solid to drill into. This makes accurate drilling
easier if you don't have a drill press. After drilling the holes
I used a countersink to take the sharp edge off the sides of the holes.
The 1/4" diameter centered hole at the bottom of the diagram is a hole
to allow the focuser tension knob to pass through. The tension knob is
not necessary as the Robofocus motor provides adequate tension to hold
the focuser drawtube firmly in place. I replaced the tension knob with
a screw and washer.
Just above the tension knob hole are two 5/16" diameter holes. These correspond
with the two screws that hold the focuser pinion housing in place on the
focuser body. These two screws are hex head screws that are recessed into
the pinion body. The 5/16" diameter holes in the Robofocus bracket are
wide enough to allow access to these screws. This is necessary when installing
the bracket.

Before mounting the bracket on the focuser, you might want to put a thin
piece of felt or something else to protect the focuser finish.
Loosly mount the Robofocus motor on the bracket. After removing the
focuser coarse knob, slide the Robofocus coupler onto the pinion shaft.
Loosly mount the bracket onto the pinion housing by using the tension knob
(or replacement screw). Remove one of the hex-head screws that hold the
pinion housing in place through the 5/16" hole. Replace with a screw and
washer (make sure not to use a screw that is too long or you may damage
the rack gear). Once you have replaced one of the stock hex-head screws,
remove the other and replace with another screw/washer.
At this point first tighten the shaft coupler firmly, then bolt down the
bracket.
I painted the bracket using a glossy black hard enamel paint intended
for appliances. Altogether I think I paid about $8 total.
Annoying disclaimer: If you attempt to make one of these brackets
yourself, I will not be held responsible for any cosmetic or mechanical
damage to your equipment.
